Tuesday, September 29, 2009

Aprons: A Short History

Pioneer women would have worn aprons and pinafores daily. They were also a staple in both my grandmothers kitchen drawers.  I even remember one grandmother pinning an on old tea cloth (square table cloth) that she kept just for when she did cake decorating. She used a diaper pin to pin it to the front of her dress.

I love aprons, the Hillbilly Housewife converted me. I really had problems with our children taking me for granted, that I should drop everything and come running  to fix every problem. Wearing my apron actually made a big difference.  It became my "Mom at work" uniform. They now know that when I have it on I'm in working mode and am not to be disturbed for things they can do by themselves.
I also really like this history lesson on aprons.  It has been posted as a link before, but it is a worth while read.

I received one of those “send it to everyone” emails from my cousin that I actually enjoyed reading, and I pass it on to you…

By HatsFineandFancy

  • Apron History
I don’t think most kids know what an apron is.
The principal use of Grandma’s apron was to protect the dress underneath, because she only had a few, it was easier to wash aprons than dresses.
And they used less material, but along with that, it served as a potholder for removing hot pans from the oven.
It was wonderful for drying children’s tears, and on occasion was even used for cleaning out dirty ears.
From the chicken coop, the apron was used for carrying eggs, fussy chicks, and sometimes half-hatched
eggs to be finished in the warming oven.
When company came, those aprons were ideal hiding places for shy kids.
And when the weather was cold, grandma wrapped it around
her arms.
Those big old aprons wiped many a perspiring brow, bent
over the hot wood stove.
Chips and kindling wood were brought into the kitchen in that apron.
From the garden, it carried all sorts of vegetables. After the peas had been shelled, it carried out the hulls.
In the fall, the apron was used to bring in apples that had fallen from the trees.
When unexpected company drove up the road, it was surprising how much furniture that old apron could dust in a matter of seconds.
When dinner was ready, Grandma walked out onto the porch, waved her apron, and the men knew it was time to come in from the fields to dinner.
It will be a long time before someone invents something that will replace that ‘old-time apron’ that served so many purposes.
- source unknown


My 1st year garden

By a-chan

Growing up, my mom always wanted a garden. When we finally bought a house "in the country," we were excited that we could have our own garden. Over the years, gardening has really become a passion for my mom. I always had a little corner that I could plant whatever I wanted. Some years I did flowers (daisies, small sunflowers, a mini rose bush) others I tried carrots, mini pumpkins and kohlrabi. In high school, I took over the pumpkins. We tore out the side yard to plant a pumpkin patch. I was really into it for a few years, but stopped once I left for college.

My husband and I bought a townhouse 3 years ago, in town with a small yard. I didn't really think I could garden in it until this spring. With everyone so into growing your own food, I thought I might be able to make it work.

I didn't really think it out very well, but I jumped right in. I picked out my favorite things to grow and started the seeds inside. After they were growing, I dug up a small plot in my front yard and shoved the starters in the ground. Surprisingly enough, nothing died! The radishes were ripe first, then some kohlrabi. The rest has been a little disappointing. My pumpkin vines didn't grow pumpkins and I only got one lemon cucumber. My sunflowers were blown over in a wind storm.

I already have a plan for next year: square foot gardening. I can use the same space I used this year, but plant a lot more.

Herbs: To Dry and Taste


It's time to reap the benefits of that herb garden! Drying your herbs allows you to use them all year long. To dry herbs, first harvest them by using a knife or scissors low on the stem. Remove the lower leaves exposing part of the main stem. If herbs are dirty, spray with a mist bottle and dry thoroughly. Bundle 5-10 stems together and tie with kitchen twine or yarn.

Find a dry, warm (68F/20C), dark and well ventilated space to hang the herbs. If you can't find a dark place, use a brown paper bag with ventilation holes to cover the herbs as they hang. Leave the herbs for 1-3 weeks or until leaves have become crumbly. Thicker stems will take longer to dry. Choose to keep the leaves whole, or crush or grind finely. Store herbs in air tight jars, label. Herbs will keep one year.

Here are some recipes courtesy of Midwest Michigan Herb Association.

Herbal Blend Popcorn

3 Tbls. butter-flavored sprinkles (like Molly McButter)
2 Tbls. grated parmesan cheese
1 tsp. dried basil, crushed
1 tsp. dried parsley flakes, crushed
1 tsp. chopped fresh rosemary

Mix all ingredients together and put in a 4 oz. shaker bottle. To keep free flowing, store in refrigerator.


Basic Herbal Mustard

1 cup yellow mustard, divided
1 cup Dijon mustard, divided
1 Tbls. honey, optional
2 Tbls. of your choice of herbal blends, listed below.

Stir all ingredients together and put in a sterile glass jar. Cover and (if using for gift) decorate lid with a square of fabric and raffia. Label. Let set about 2 weeks in a cool, dark cupboard for flavors to blend. Refrigerate after you begin to use the mustard.

Three Herb Blend

1/3 cup dried dill
1/3 cup dried basil
1/3 cup dried parsley

Scarborough Fair Blend

1/4 cup dried parsley
1/4 cup dried thyme
1/8 cup finely ground rosemary
1/8 cup finely ground sage

Herbs de Provence

2 Tbls. dried basil
2 Tbls. marjoram
1 Tbls. summer savory
1 Tbls. thyme
1 Tbls. finely ground lavender
1 tsp. ground rosemary

Herbal mustards can be served with pretzels or over sausage links or ham. It is also good mixed with plain yogurt and drizzled over blanched vegetables such as asparagus or cauliflower, served warm or cold.

By bethanyg

Pioneers of the Ozarks: A Book Review


A Book By Lennis L. Broadfoot


A Review By SarahJayne


The records of history are full of dates, facts, and the accomplishments of important people, but these form only the embroidery decorating a more substantial fabric. That fabric is made up of the everyday actions, choices, and work of a nation's people. Most often the thoughts, cares, and beliefs of such people slip away unrecorded in favor of the events that history deems “important.” Pioneers of the Ozarks by Lennis L. Broadfoot is a joy to read because it offers that rare glimpse into the lives of the real history makers –those who rolled up their sleeves and made a home and community in the midst of wilderness.


The author begins by introducing himself, the son of homesteaders who had moved from Tennessee to Eminence, MO. He writes of his early childhood in the small log cabin that his parents had built from the timber off the rugged land. From a young age, he developed a fascination with people and capturing their images in sketches using bits of soap on a window pane or a broken piece of chalk snitched from the one-room school house. As a young man, Broadfoot traveled west, working as a ranch had and drawing scenes of the west. He eventually received some formal artistic training and became a free lance commercial artist. In 1936, Broadfoot left California to return home and begin the works featured in this book. He says of this decision; “I would rather draw a picture of an Ozark grandmother loitering about her cabin....than all the glamour girls in Hollywood.”


In his pictures, Broadfoot shows us the harsh realities of pioneer life written in the wrinkled, leathery faces of the elderly, who speak to him of their memories of the civil war as he sets down their likeness on paper. They share also their joys: their love for the beauty of the Ozarks and the provision of its wild resources, their appreciation of the community that works, laughs and mourns together. Many of the people choose to be shown at work or with examples of their craftsmanship,. These are people with an intense sense of pride, in workmanship, ingenuity, and independence. They seem to define who that are by what they do, how they provide for their families and the services they provide the community. Others prefer to share the picture with their animal companions, a hard working, gentle team of oxen, the loyal donkey who carries its owner deep into the rugged hills in search of mushrooms and ginseng root, or the fearless coon dog laying at his proud master's feet.


The wisdom of these Ozark pioneers is timeless; their cares and fears as relevant today as the day they shared them with the author. John Musgrave and “Uncle Sammy”, both veterans of the civil war (though on different sides) share many of the same thoughts on the horrors of war and the suffering it brought to soldier and civilian alike. Many, like the out-of-work carriage builder looked upon the “progress” of the automobile and the way it was changing society with skepticism and a touch of bitterness, saying that it “has caused all the world to go speed crazy and do nothing but burn up time and money.” The women seemed very concerned about the future of homelife. Arminta Taylor, aged 91, comments, “People these days don't know nothin' about raising families. Times are too modern, and they druther raise poodle dogs than babies.”


The hardships of pioneer life would provide most with ample opportunity to complain, yet the folks that have shared a bit of their lives with us through this book chose not to. Instead, they told Broadfoot as he quietly sketched how grateful they felt and how contented and peaceful their lives had been. Mrs. Delilah McKeethlen , who is knitting a sock as she speaks, says, “I'd ruther live outdoors an' sleep under a shade tree with nothing to eat but corn bread an' sorghum molasses if I can live in peace an' go to church than to have all the wealth on earth, an' live in a mad ol' world...” Basket-maker, Bob Derryberry on the next page adds, “I have wondered a lot ov times jist how I got by an' raised my family, but if a feller is handy about doin' things, the Ozarks is a purty good place ter live, 'cause ye can find material ter make most anything ye want.” Out of all the characters in the book, old Tom puts it best: “I am out in the hills early an' late. I see the ground hogs sit on high cliff rocks, and chirp. I watch the squirrel as he runs grapevines or sits in tops of tall hickory nut trees an' whittles nuts. I see the chipmunk as he scampers along logs with his pouches filled with acorns an' nuts, storin' them away fer winter's food. I see wild deer leap, an' hear the wild turkey gobble. I hear the wolves howl, an' the ol' mountain bobcat as he gives a wicked, vicious roar high up on the brushy mountainside. I hear the owls hoot, an' the whippoorwill an' nightingale sing. I see an' hear all these things that I love an' enjoy, an' yet people wonder if the meager sum I get fer choppin' wood is all 'Ol' Tom' gets out of life.”


I encourage you all, see if this old book is in your library; I believe you will find it as interesting and informative as I have. It will certainly give you another layer of understanding as we continue our readings of Laura Ingalls Wilder's books and the struggles and adventures of her family.


The drawings of the pioneers are so interesting and perfectly suited in their carefree, somewhat rustic nature to the subjects that I would have liked to show you a few. Unfortunately, I wasn't sure about the possible copyright issues, so instead I'll just direct you to other pages where you can see them for yourself.


http://www.westplains.net/tourism/artsandculture.asp -scroll down (also on this page is Laura's Mansfield house)


Monday, September 28, 2009

Read Along: Week Thirteen - The Deer in the Woods

I love autumn. It is my favorite season because of all the colors and smells it holds. But it does remind us that winter is coming, and there is always a lot to do to get ready when you live in a snow climate.

So here are this weeks activities:

  • 1: Not all of us live where we can see Deer and other large, beautiful wild animals. But no matter where we live there is one species that can be found almost anywhere, Birds!
Hang a bird feeder - build or buy a wooden one and some seed and hang it from a tree that you can see from a window. You could also collect pine cones and “butter” them with lard (from the baking isle in the grocery store) and then roll the cone in bird seed. Tie a string around the cone and hang from a branch. Now Watch! Get to know your winged neighbors. Be on the look out for birds. If you don’t recognize them, look them up on a provincial or state autobahn society web site or books from the library. Take pictures or draw them in a journal and add a description and any information you learn about them.

For sewers, beginner or advanced, lets make a nine patch wall hanging or pillow to start with. Here is a wall hanging or doll quilt tutorial and a pillow tutorial (great for first timers). But feel free to search for your own pattern as well. Try sewing some of it, if not all of it by hand. But if you get flustered I won’t mind anyone using the machine. Inspiration is always welcome. So feel free to show off quilts you have made or handmade ones you have in your own home. Send us a pictures please!

  • .What do you think about Laura’s life? Did it bring back memories of your own child hood? What was your favorite part of this book?

Wednesday, September 23, 2009

Little House on The Prairie

SO... we're onto book two real soon.  The most popular name used to referance Laura's travels Little House on the Prairie. So pick up your copy and dive in! If you have trouble locating a copy, here is a link for a download PDF version BUT sometimes the site "Megaupload" has border on offensive advertising on their download page, (so don't open the link in front of children!) The PDF's are clear and include the pictures from the books and are family looking friendly.

Monday, September 21, 2009

Read Along: Week twelve - The Wonderful Machine

alt text
Farming equipment sure has come a long way since Pa’s day! (That’s my dad and my son “Deere” hunting at the local dealership…they were looking for lawn tractors!)

Activities for this week:
  •  Take a fall walk down a country lane or a local farmers market to collect fall things. If you choose to hike, pick up leaves and nuts and enjoy the fall colors. Go to a pick your own orchard or pumpkin patch!
If you choose the farmers market, pick up seasonal fruit and vegetables, some to eat and some for decorating with.
Which ever you choose, don’t forget to take a deep breath and enjoy the earthy smells of autumn :o)

  • : Make a hat! (I’m seeing potential Christmas presents stock up here!) Any kind will do… knit, crochet, sew or figure out how to braid like ma. Make a toque, a cloche, a beret or one worthy of the Derby.
If you would rather, pre-purchase a hat and decorate it with ribbons and flowers for fall to use as a wreath on your door.
Or, make a hat or bonnet for your doll (remember the ones we made a long time ago!)

  • 3: It’s getting closer to pumpkin season, lets share some recipes for pumpkin or squash. Desserts, side dishes, soup and preserves.


by HatsFineandFancy

Wednesday, September 16, 2009

Read Along: Week Eleven - Harvest

Poor Charlie! I wonder if he learned his lesson after that? One bee sting can hurt, but a whole nest of them stinging could have been fatal. There were no Dr.s near by every Ma and Pa had to rely on their wealth of knowledge about the land to survive. Knowing which plants took away pain, or fever was important.

Activities:
  • Discuss First Aid as a family. Learn your local emergency numbers. Put together a first aid kit, one for the car, kitchen and one for the bathroom. Don’t forget burn ointment and a pain relief ointment, bandages and cleaning pads/swabs, tweezers and a bottle of alcohol or peroxide.

  •  Make a hot/cold pack for pain relief. Make a bag from quilting quality cotton fabric and fill it with rice or barley, corn feed or wheat and sew it closed. Make them in different shapes, long for under your neck, small for little boo boo’s, square for joints or wide for back aches. Add petals such as rose, rosemary or lavender for some aroma therapy. Keep in the freezer (cold effect will last about 30 min when in use) or mic in the microwave about 5 min for hot treatments.

  • What home remedies do you use, for colds, coughs, fever, stings, slivers etc. Lets talk about them below (and so no one else has to add this warning…) use at your own risk. Most remedies are not “medically approved” so check with your doctor immediately if you use them and have adverse reactions.
BUT, that does not mean that they don’t work so I would love to hear what remedies you use!

By HatsFineandFancy

Read Along: Week Ten- Summer Time

  1. Mrs. Peterson gives Laura and Mary little cookies to snack on for their walk home. Make a batch of shortbread cookies to eat with tea, or perhaps some sugar cookies, complete with pink icing (or whatever color suits your fancy).
  2. Research and discuss the many different ways that folks heat their homes. Laura and Mary had to gather wood chips for the fireplace. How do any of you heat your homes in the winter? We simply have an old gas furnace, but we also have a fireplace. One of my SILs had a pellet stove when she lived at her last residence before purchasing her current one. If you are reading this with your children, discuss the pros and cons of different types of heating (fireplace, woodburning stoves, pellet stoves, solar heating/cooling, gas heat, steam, baseboard electrical heating, gravity heat, etc.).
  3. Discussion questions for the group: What color hair do you have? Is it your natural color? What color were you born with? If your color didn’t change naturally (and you’re willing to confess ;) ), why did you change it? Are you one of those whose hair did change naturally?
  4. Make some homemade cheeses. Here are some links below for some various kinds: Ricotta cheese easy Mozzerella cheese very involved Yogurt cheese extremely easy! this is like cream cheese, and can be mixed with anything to help lower fat content in foods by “thinning” them out with it :D Mascarpone Cheese so easy and inexpensive to make, I can’t believe it’s that expensive to purchase in a store! It does take a couple days, and it doesn’t stay fresh longer than a week, but I hear it’s worth it.

    By Tracey4610

Read Along: Week Nine- Going to Town

Without further ado, here we go!
  1. Have a picnic outside with your family in a natural setting, like a park, your backyard, a field, etc. Keep the foods whole and simple, if you can.
  2. Discuss with your family (or, if you don’t have kids, etc., but perhaps keep a journal, write your thoughts) about how town/city life is different from living in the country, or how different small town life might be from city life, etc. What are the differences of each in Laura’s time compared with today? Do we have general stores? What could be our equivalent? For Laura’s family, it was a big event: the horses were curried, the girls were bathed and wore their hair ribbons and Sunday dresses in the middle of the week. For a modern day trip, how does your family prepare? If you can, please share your thoughts with us …
  3. With your children, set up a “general store” setting with items from around your house. Remember, bartering was the currency of the time, so prompting your children to think about their gifts and talents (i.e., writing a story, drawing pictures, produce from the garden, sewing, “trapping” for furs–stuffed animals would work, or faux fur scraps–yarn, etc) to trade for the goods in the store. Who will be the store keeper? Perhaps at first, Mom or Dad should, then one of the children will “inherit” the store.
  4. Try making a spring meal, where there is little meat other than perhaps eggs. Pa couldn’t hunt much in the spring, because that’s when the babies are still growing, and the mothers are taking care of them. What would your meals consist of? You have dairy, poultry, and produce at your disposal.

    By Tracey4610

Read Along: Week Eight - Dance at Grandpas

Dances!
Our countries were settled by a large variety of European settlers, and each one brought their home land traditions with them, including their music. When people first came to America they would settle in colonies of people from their home country, preserving a very specific heritage. But the West was opened by people from all around the world looking for land, open space. Settlements could be made up of a number of nationalities, and in winter entertaining , traditions would be passed on to their neighbors. For example, if you had a French neighbor with an accordion, they might take a liking to your Irish song and learn to play along! And then your Scandinavian neighbor would dance along in a jig step from his motherland. In present time we can take lessons for dance or music that is specific to a nationality or a time period, but in Laura’s day they came with what they had. And with that came some very new and unique styles of music and dance. (Which can drive traditionalist dancers crazy! ;o)
European inspired dance music is mostly made up of 6 main rhythms , the jig, hornpipe, strathspey, clog, reel, and waltz. If you are doing a search for traditional music, those are keywords to Google. Being that each song of the listed styles were written in the same rhythms, almost any dance you already knew in that style could be adapted to the songs.
So how about a Kitchen Party!! You can dance as a couple, as a group or solo (like Laura’s Grandma)

Here are some links to give you an idea:
From members of our own LHOTP:
And two non member link:
Or just have a night of music and fun with your own family, using modern music and your CD player! Have a talent show with the musically talented people of your family, or do an air band! Here is a link to my own blog, as this is a special treat we do occasionally as a family.

If you want to make a really fun night of it, take all the recipes previously posted and have a party. Make your johnny cake , breads, baked beans (I know, we haven’t posted these, but it’s what Caroline always took to parties and gatherings), pies, etc. Make some lemonade, sun tea, or drink milk or water to go with it all. If you’re in a summery season, take your music outside to your deck or patio (if available or are permitted–I know that in some apartment complexes it’s not permissible), as well as your food, and have a small party with it. Have a great time! Oh, and by the way, smother all your food in maple syrup–I’ve heard it’s pretty good.

By HatsFineandFancy

Read Along: Week Seven - Sugar Snow

First off, the chapter is called “Sugar Snow”. Winter is beginning to wain, there’s still frost on the windows, and the sap is starting to run in the maple trees (well, for the Ingalls family at any rate…here, in Ohio, it began running back in February so we’re a bit late for that! So here are a few things you can do with your family:
  1. Make more johnny cakes (originally posted in week 1). Use real maple syrup on top instead of a corn-based syrup (if you have never had maple syrup before, you’re in for a treat! you’ll never want to go back to the other stuff! :D ) for a topping.
  2. Make maple sugar candy.. This is just one recipe. :) Laura and Mary used snow to cool theirs, and if you have an ice shaver, you could make your own “snow” to cool your candy (or, just stick it in the freezer if you don’t have an ice shaver).
  3. Here is another way of making what I would normally call Cracker Jack. It’s a nice popcorn candy made with real maple syrup.
  4. Do a recipe search on your favorite sites and make something using real maple syrup.
For Christmas in July, we’ll be focusing on lace this week. What?! Lace?! Ooooo… So here are some ideas:
  1. Make some small lace pieces, whether you knit or crochet, and adhere them to blank note cards for a decoration. Crocheted Irish lace flora are very well-suited to this purpose, and there are many, many patterns at antiquepatternslibrary.org. If you have never used a vintage pattern before and are used to modern American terminology, be warned: a dc in the patterns will actually be an sc.
    For more lace projects, there are numerous ideas! Make some lace gloves (patterns are available here on ravelry, as well as on crochetpatterncentral.com and knittingpatterncentral.com), lace scarves, begin a lace shawl. For a bookmark, make a narrow lace sample (a knitted single panel would suffice, or a crocheted edging pattern, followed on both sides of the sample) there are other patterns available on the links listed above.
2. Speaking of Christmas, why not begin your ornaments?  There are many, many ornaments, especially thread ones, on the web. Perhaps a few snowflakes here and there, or perhaps some stars, crosses, garlands, flowers, Christmas trees, etc.!

3. Oh, and what says “July” better than an ice cold pitcher of lemonade or sun tea (there’s a nice minty one here? I just tried the brown sugar lemonade (I had to use Real Lemon, as I don’t keep whole lemons in my house), and it’s yummy!!

By Tracey4610

Read Along: Week Six - The Two Bears

Chapter 6 is called “The Two Bears”. We will also continue to do the Christmas in July stuff, as well.


Pictures from HatsFineandFancy from a Museum visit.  The Ontario Black Bear

  1. Discuss different types of optical illusions. Look at Rorschach (sp?) prints and see what things you might find, or look at Escher paintings/prints.
  2. Google the type of brown bears that lived in Wisconsin during the mid-to-late 1800s. Compare to the types of bears that may live or have lived in your area of the world.
Christmas in July: .
  1. Flower pressing. For those of us in the northern hemisphere, flowers are all around us right now. Pick some flowers and press them in books or make a leaf press. After a couple weeks, make them into pictures, or put them in a scrapbook, with their names and where you found them. Or for Christmas presents, mount them into a picture frame to be hung on a wall or used as a serving tray. Or mount them onto cards or writing paper with clear mactac to give as stationary sets.

  2. Flower Pounding Tutorial: There are some great tutorials online. I have done this with preschoolers, and they love it! Find some brightly-colored flowers; some light-colored cotton or linen (no synthetics!) fabric; a rubber mallet, child’s building block, or something other that fits nicely into your hand and you can safely pound it without it breaking; a flat surface on which to pound; old newspapers/brown paper, or anything else you can use to place between the pounding surface and the fabric.
Cover your work area with the old paper. Pull off individual petals from the flower and arrange them however you would like on the paper. (This is best if you start small) You can make a picture, or arrange the flower the way it was naturally grown, or just petals from different flowers, etc. Carefully place the fabric on top in a single layer. Locate the petals underneath, and, taking your pounding tool, gently pound on top of the fabric where the petals are. You should be able to see the pigments of the petals coming through, especially if it is a thin fabric. The petals should eventually be destroyed, and you can only use each one once. But on the fabric, you should see the imprints of those petals. You can then set the colors on the fabric in your dryer, or even lay it out in the sun on the grass for a few hours.
 

Read Along: Week Four - Christmas

 Since week 4 (and thus chapter 4) is about Christmas, waddaya say we do a Christmas in June/July? We can take it a couple weeks, since there is soooo much in this chapter, plus it would give those of us who make gifts
ahead of time a chance to begin Christmas gifts to set aside for later.

1) Make mittens for your family for Christmas. There are several free patterns available here Ravelry
 or elsewhere on the net. They can be knitted, crocheted, or sewn.
 Make a matching muffler/scarf/neckwarmer to go with the mittens.

3) Summer is a great time to teach boys to whittle and carve. Pa (Charles Ingalls) carved the
famous bracket for Ma’s china shepherdess and gave it to her in this chapter. Perhaps this is
where the dads come in to do the whittling/carving lessons?

4) Sew a needle book. There are several adorable patterns/ideas online .  If you have finished your sewing basket, and if it is to be a gift, a needle book would be the perfect accessory to put inside it, complete with a set of needles!!
And what would make a better companion to a needle case than a thimble case?(and here) Simply
knit/crochet/sew a tiny drawstring bag that is big enough for a thimble. Even a miniature doily
pattern would suffice–or look up amulet bags. Just add a drawstring and voila! a thimble case. To add it to your sewing basket, sew a button to the underside of the lid and wrap the loop end of the drawstring
around the button a couple times.
  
5) Make mittens, scarf, and hat for your rag doll. Also, be sure to include some nice wool
stockings, as well! Perhaps even a nice felt coat to wear over her best dress or his best suit.

by Tracey 4610

Tutorial: Sewing Basket

I was rather unsuccessful at finding a nice basket for dd1 while at the thrift store today (though, we did find her a small picnic basket, complete with dishes, flatware, and toy food); however, I will share with you what I plan to do once I find one. There are 2 free patterns/tutorials on freepatterns.com and tipnut.com, which you may also use. I’m just going to “wing it” and make dd’s basket as follows:
  1. Measure the basket. If you don’t like the look of the outside and don’t mind covering it, measure the basket from top to bottom and from side to side (if it is a round basket, measure from top to bottom, then around), taking note of all your measurements. Measure the bottom of the basket, length and width, or the diameter if it’s round. Repeat for the inside of the basket.
  2. If you want your basket to be a bit plush, measure out and cut to size the batting you wish to use. If you don’t wish to use batting, skip this step. I will probably line dd’s with felt on the inside of the lining fabric instead of using batting. Fit the batting to the inside of the basket if desired.
  3. Measure and cut your fabric, giving at least 1/4” seam allowance. If you plan to use batting, make sure you add a little extra fabric, especially if you plan to bat the outside, as well. Make sure the pieces are either labeled or separated if you are covering the outside as well as the inside.
  4. Pin the inside side pieces together and sew all top-to-bottom seams. Fit and pin the bottom piece on, then sew. Place the lining into the basket and whipstitch in some way to the basket frame.
  5. Pin the outside side pieces together (if desired) and sew all top-to-bottom seams. Fit the bottom piece to the side pieces, pin, and sew. Place the batting where desired on the outside (if you choose)–I don’t recommend batting the bottom, however–and fit the outside cover over the batting. Whipstitch cover to the frame of the basket.
  6. Cut 2 12” lengths of ribbon, fold in half (so each length is 6” long) and sew to the side where you wish to attach your lid–these will be your hinges.
  7. You may use any of the following to “finish” the bottom of the basket: Take 2 lengths of wide coordinating ribbon and fit one length to the top rim of the inside of the basket, making certain that the top of the inside lining seam is covered by the bottom of the ribbon and the top of the ribbon does not go much past the top of the frame (in some cases, you may need a really wide ribbon). Hem-stitch the bottom of the ribbon to the top of the lining. Repeat with the second length of ribbon (if desired) for the outside of the basket. If using 2 lengths of ribbon, once they are hem-stitched to the fabric on the inside and the outside, sew the top edges of the ribbons together above the frame of the basket where they meet. If you want to skip the sewing of the ribbon(s), you can cheat and glue them on. I’ve even seen the ribbons stapled onto the frames and buttons either sewn on or glued on to cover the staples.
  8. Cut to size a piece of sturdy cardboard, plastic canvas, or whatever you choose to use for a lid.
  9. Cut to size your batting and fabric (again, adding extra fabric for the use of batting). Add an extra inch to the back of the fabric where the “hinges” will be tied to the lid. Sew together 3 sides of the lid cover, leaving the 4th side open.
  10. Place batting on the lid, and fit cover over both. Sew final seam closed. Sew a strong seam 1” inside the extra fabric–this should be where the cardboard/canvas/etc. ends.
  11. Place lid over top of basket. Mark on the extra 1” fabric where the ribbons are placed on the basket. Remove lid, and work 2 button holes wide enough for the ribbons to come through.
  12. Return lid to top of the basket and pull one side of the 6” length of ribbons through each button hole. Tie in a bow. you may wish to sew a strong knot in the middle of the bow to keep it from becoming untied.
  13. For a closure, you may choose to do any of the following:
a) sew one half of a frog closure to the lid and the other half to the basket where it would meet the lid.
b) sew a loop of ribbon to the lid, with a button over the ends of the ribbon, and sew a button to the basket
c) make a tab from extra fabric and sew snap closures to the tab and basket
d) be creative! use whatever you prefer. :)
If you like, go ahead and sew in some pockets to your lining.
you may also use your basket as you wish, but there will be more up-coming projects to outfit it (not to give anything away, but things like notions holders and the like–further details to come!!). We can even extend this sewing basket project for another week, since i was so late in typing up these instructions and I can’t find a basket yet.
Please post your results!

by Tracey4610

Read Along: Week Three- The Long Rifle

This week, we’ll be reading “The Long Rifle”. There is not much in the way of crafting going on in this chapter, however, we did come up with some fun family stuff, as well as some things to prepare for future chapters.
 
1.
  1. Go on a nature hike with the family. Use your senses to explore the area around you. Write down and also draw what you see, hear, and smell, as well as what some of the greenery feels like when you touch it. If you can, return at night or dusk and pick a spot in which to sit very still. Remember to take a flashlight with you, and cover it with red cellophane if you can (the red won’t hurt your eyes, and the animals around you won’t be disturbed by it, either). When you return home, write down what you experienced on your walk.


  2. As a family, discuss gun safety. If you have guns in the house, talk with your kids about the importance of not handling them without adult supervision. Also, if you have little ones in the house, discuss with them that what they may see on tv or in movies is not real, and that someone could get really hurt with guns. Don’t go overboard, and don’t be over-paranoid. Talk about how guns were a very important part of every day life in Laura’s time. For some people, guns still are. If you have boys, make for them a “bullet pouch” out of a simple bag pattern with a draw-string, and allow them to find small stones to fill it up with. Using some stuffed animals from your house, take them outside and have the animals ‘hide’. When your child finds them, he “shoots” them by tossing a stone at it (note: remind your child it is NOT okay to throw rocks at real animals!!).


  3. Since we’ll be doing a lot of sewing throughout the upcoming weeks, I think it would be prudent to make a sewing basket.  Begin by looking for a nice-sized, sturdy, handled basket. Gather up the following: a sturdy piece of cardboard/plastic canvas/thin luan (used in making doors) or a thin piece of something that is big enough to fit over the circumference of your basket; a small amount of batting (if desired), enough fabric to cover the outside of the lid, the inside of the lid, plus fabric to line the inside of the basket coordinating fabrics to make pockets and such embroidery floss, if desired sewing needles pins coordinating thread buttons, if desired, for the inside ribbon, about 1/4”-5/8” wide (don’t know about international measurements) to use as hinges and to close the basket large button or toggle, or even a matching frog (a type of closure generally used in coats/capes, found at places like JoAnn’s and Hobby lobby) to close your basket .  There are also several websites that have directions as well. 1 2 3  (or Tracey's very own tutorial copied over from our  Ravelry group)

Tell us how your adventures were!!

by Tracey4610

Some pictures by HatsFineandFancy on a museum visit
 

Read Along: Week Two - Winter Days and Winter Nights

For Week Two, we will be reading Chapter Two, Winter Days and Winter Nights.
Feel free to do all of the activities if you would like to, but don’t feel OBLIGATED to. Do the ones you can!
Here are our activities!
  • Family Activity: (choose one, or do them all!): Play Mad Dog like Pa did with Mary and Laura. Sing Yankee-Doodle-Dandy. Tell stories to each other in the evening before bed (a Bear story would be great… maybe Goldilocks?).
  • Do chores: In this chapter Laura describes the different chores Ma schedules out each week. They are: “wash on Monday iron on Tuesday, mend on Wednesday, churn on Thursday, clean on Friday, bake on Saturday, rest on Sunday.” She also mentions that even when they were little Laura and Mary helped with making the bed and doing dishes by hand. Try to do as many of these chores as possible this week to get a feel for the kinds of things they had to do in Laura’s house.
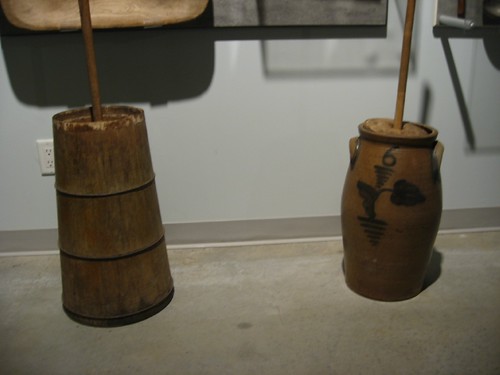
  • Make Butter: We found two sites with good directions for making butter without a churn since they can be hard to find. Here is a great one Lauri found, and here is another with similar instructions geared toward adults. :) Don’t forget to try dyeing your butter with the juice from carrot shavings like Ma did, and of course, taste the buttermilk as well!
  • Bake Bread: If you want a bread you can knead, try this one for Amish White Bread, as it received rave reviews from the girls over at Reclaim the Home. However, I am partial to this recipe because it uses so little yeast and as such is very frugal. It is a delicious recipe too, and you don’t have to knead. LOVE that!  Here’s my bread from this recipe: 
  •  Make Paper Dolls: Laura and Mary loved to play with the paper dolls that Ma cut out for them. Try cutting out some paper dolls yourself to play with. If you’re not good at doing things freehand,there are lovely websites with printables. Try printing them out on construction paper to have the dolls be dressed in “colored paper” like Mary and Laura’s dolls were. You could even try cutting out a bear and acting out the story that Pa described in the book (thank you Lauri for this idea!)

by homegrownrose 

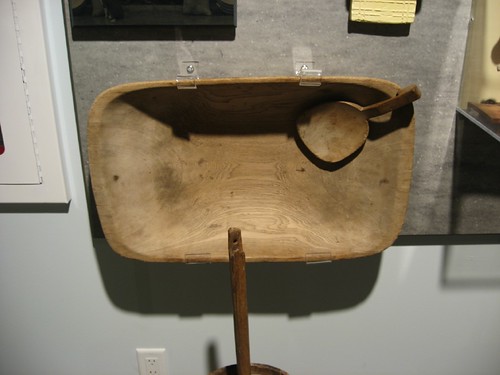
Pictures by HatsFineandFancy on  museum visit - Butter making tools

Read Along: Week One - Little House in the Big Woods

For any non "Ravelers" who want to join in on the reading fun, I am slowly going to upload our activities as posted by various moderators.  I will sign them with their Rav names and if you are able to click their names, it will take them to their own personal blogs. Pictures that accompany will be mine or used with permission from other group members.  If you wish to submit your own pictures, we would be happy to ad them in!

If you can't find a paper back copy of the book, I have found a PDF download link for it (but be pre warned, sometimes the side bar adds on the download site are a little racey)

For week One we will be reading Chapter One of Little House in the Big Woods.
Feel free to do all of the activities if you would like to, but don’t feel OBLIGATED to. Do the ones you can!
Here are our activities!

  • Go on a nature walk and collect sticks and other natural items (you will want a lot of sticks as they will go with another activity this week!)
  • Use your sticks and natural items that you gathered on your walk (or rolled up brown paper) to create a miniature “Little House” using these instructions Check out this miniture cabin for inspiration We will add to this throughout the challenge, so have fun with it. It doesn’t have to be perfect, but can be as detailed or as simple as you like. 
  • Make Beef Jerky  (We found a lot of vegetarians a part of our group and so we also suggested making dried fruit or fruit leather: You can make dried apple slices (cut 1/2 inch thick and soak lightly in lemon juice) then dry with the jerky oven method recipe. Or blend a combination of fruits/berries up in your blender and pour onto a cookie sheet to make fruit leather in your oven.  Here's an example)
  • Make Johnnycakes using this recipe: 1cup of cornmeal,1 teaspoon each sugar and salt. Add 1 1/4  cups water, creating a thick batter. If you want your johnny cake thinner, add one half cup water or milk for a more rich flavor. Drop the batter onto a buttered or greased griddle, fry until pale brown, and flip to cook the other side. Serve the johnny cake  warm with toppings of choice; butter and maple syrup are common, although jam and savory spreads can be used as well.
  • Make a rag-doll with a free pattern We will be making more things for our dolls (both male and female depending on which doll you want to have), so please make this if you can! Don’t forget to hand-sew and use recycled fabrics if possible. I used an old white sheet that I had for the doll base!
by homegrownrose


House made by HatsFineandFancy and Family

Wednesday, September 9, 2009

Frontier Gazette


Welcome to Frontier Gazette! This is a spin off blog for Ravelry's Little House on the Prairie group that is being set up for an on going swap. We are reading through the entire st of Laura Ingalls books and trying to complete activities and discussions that gear around the chapters.Most of us have a common interest in wool fiber crafts, such as knitting and crochet. We are trying to learn new "old" skills in the kitchen, garden and sewing room and we're making new friends in the process. Welcome to all!

Free Blog Counter