Showing posts with label Craft Tutorial. Show all posts

Tuesday, December 1, 2009

Read Along: Week 23: A Roof and a Floor


  • Family activity: If you and your kids made a log house back at the beginning of our read-a-long, they may enjoy making some furnature like a bead-stead or a table.
Materials:
gathered twigs or popsicle sticks
strong string
white glue
small amount of scrap cloth
stuffing
needle & thread, scissors
Instructions:
cut the twigs or popsicle sticks to size (I used pruning shears that were handy) and use strong string to bind the uprights to the cross-pieces as in these pictures:
activiy pt1
activity pt2
This may require cooperation (like neighbors helping each other): one person holding the pieces together while the other does the tying. Once the whole frame is together and can stand on it’s own, add a dab of glue to the joints to strengthen them & set it aside to dry.
When dry, glue other twigs/popsicle sticks across the frame lengthwise (on the lower cross-pieces) for the bed or the other direction ( on the upper cross-pieces) for a table.
activity pt3
While that is drying, make a small mattress for the bed out of scrap fabric and a little stuffing. Use another piece of scrap fabric for the blanket (or table-cloth if you’re making a table).
  • Activity: Nature Journaling
The Ingalls girls spend much of their free time exploring and observing the beautiful world around them. This is a wonderful activity for all ages and all seasons. Lets begin a nature Journal. This can be as simple or involved as you like. You can start with a spiral notebook or a fancy blank journal book. The journal can include anything from temperature & precipitation reports, sketches, found objects taped or glued in, to poems whether original or copied. Here are some links to give you some ideas and inspiration:
http://highland.hitcho.com.au/naturejournal.htm
http://www.squidoo.com/naturejournals
http://www.connecting-with-nature.net/journal_prompts.html
http://homemade.truepath.com/nature2.htm
http://www.sierraclub.org/education/nature_journal.asp
http://naturesketchers.blogspot.com/
When I was young, my Mother took us on nature walks, pointing out flowers and birds along the way. Once we chose a small plot of ground and marked it out with some twine. We returned every few days to record what we saw in that little patch. This is another way to approach nature journaling.

By SarahJayne

Read Along: Week 21- Fire in the Hearth

This week Pa built an indoor fire place so Ma can cook away from the outside elements: We don’t often cook over an indoor fire these days but I love sitting by a fireplace. It’s so cozy!
This week activities:
1: Check out this fireplace safety site. If you have children there is also a childrens game section to this site that is a lot of fun.

2: Another great thing about a fire place (or any heating source) is that it helps dry out wet mitts and boots! But do you ever have trouble finding a place to hang them? Here is a neat string rack idea.
And here is an idea my grandmother used. When I was little, she made on for each of her childrens families.
TREE BRANCH MITTEN RACK
alt text
Materials
  • One 3 foot tree branch with multiple branches hanging off of it and at least 1 inch diameter at it’s base.
  • Utility knife
  • Pruners
  • Wood glue
  • Clear varnish
  • finishing nails
  • 2 pieces of 1 inch thick(ply)wood 2 inches wide and 12 inches long
  • 2 pieces of 1 inch thick (ply)wood 2 inches wide and 3 inches long
Directions:
With your pruners, prune back each stick branch to be about 6 inches long. Using your utility knife, carefully peel the bark off of you branches and your main branch.
Varnish the entire branch to water proof it and let dry.
Make your base. Glue the 1x2x3 pieces of wood to the ends of one of the 1x2x12. Clamp to dry. (this makes feet)
Cross the two pieces or 1x2x12 in the middle to make the stand. Glue and clamp to dry.
Place the branch in the center of your base and with a hammer, nail through all the layers of the base and into the branch to hold it in place. (Alternative, use a drill and a screw.)
Set beside a heat source and place your mittens on the branches to dry!

3: What do you like to do when you relax by a fire? Read a book, curl up under a blanket, roast marshmallows?

by FineandFancy

Tuesday, October 27, 2009

Read Along: Week 18 - The House on the Prairie

A big thanks to SarahJayne for writing this weeks read along! 


This week’s chapter contains yet another frightening experience for the Ingalls family. The pioneer life is filled with dangers, and so far we have seen how Pa and Ma try to keep things light to shield the girls from their fears. Here we see what really frightens Pa, seeing his dear wife injured. It must have been terrifying to be so far from help with only home remedies to treat any sicknesses or injuries.

  • For those sharing this little house adventure with their children, this may be a good time to discuss first aid and how to tell the difference between a break and a sprain. Here is a website with simple directions. It may be interesting to talk about the kinds of medicines and remedies available to the pioneers and how medicines have changed since that time. You can find some info on that here, here, and here.

  • Our craft this week is also more geared towards the young’uns; however I have to admit I had a lot of fun with it too. We will be making a homemade guitar or fiddle.
Materials:
-4 to 6 rubber bands of the same length, the thinner ones will give a higher pitched sound
-a small box that your rubber bands can stretch around
-two pencils
-an exacto knife (parental use here, obviously)
-anything you might want to decorate your instrument with
To make a bow for your fiddle
-a wire coat hanger
-another rubber band
-wire cutters & pliers
Instructions:
1 cut a hole in the box with the exacto knife to create a soundbox
2 stretch 4 or 6 rubber bands across the hole
3 slide the pencils under the rubber bands to keep them from touching the box
4 have fun plucking the strings as a guitar
If you want to play this as a fiddle, you’ll need a bow
1 using the wire cutters, cut the wire hanger as shown:
making the bow oct09
2 using the pliers, bend the ends around to make a handle and holders for a rubber band:
making the bow2 oct09
3 add the rubber band and play! Note: mine didn’t make much sound just sliding it across the strings; I found that it worked better when striking them diagonally and bouncing the bow.
Finished project:
box fiddle oct09

  • To hear some fabulous fiddle music head on over to the
Henry Reed Collection which was put together by folklorist, Alan Jabbour in the 1960’s in an effort to document and preserve the folk music of the Virginian Appalachians. Many, if not all, of the 184 recorded songs would have been known and played by Pa around a campfire (including Old Dan Tucker). So light some candles, turn off the lights and listen to the sounds Laura & Mary heard. Maybe the kids would like to play along on their hand-made instruments too.

  • Discussion topic:
When the area of the big woods became too settled, Pa wanted to pick everything up and leave, yet it seems that the family’s interaction with their neighbors like Mr. Edwards are the most memorable, joyful times described in the books. I find this seeming contradiction interesting; What do you think?

By SarahJayne

Monday, October 12, 2009

Read Along: Week Sixteen - Camping on the High Prairie

I love camping. I’ve roughed it, tented it, trailer’ed it and enjoyed rustic cabins. I just like being away from the hustle of cities and I love looking out a window and seeing nature right outside. But after two weeks I am more than ready to go home to real bath tubs running water and electricity!
I am writing this post on a damp and cold autumn day in October in mid-west Ontario. I know within a month we will probably see snow. But the trees are changing colors and I am sure we will still have a few more sunny days to enjoy outside. And of course, we will soon have piles of leaves to clear from the yard. So here is what I have planned for the our family, and I hope everyone else will enjoy participating as well.

  • 1: Lets make beans! Soaked beans are a food Ma could have carried with them, but they would take too much time to make.
Baked beans and chili are a staple for camping in our region and comfort food at our house. I especially like putting them in my crock pot and forgetting about them until supper. Homemade baked beans are my favorite, but I rarely have time to soak the dried beans and cook them. But I have come up with a recipe that makes canned beans taste really good. (and you need the cans for the next project!)
Home-style Baked Beans
4 cans of Beans in Tomato sauce (Pork and beans)
1/3 cup molasses
1 1/2 tsp dried mustard
1 onion chopped fine
1 pkg of sausage
Cook the sausage and onion together and cut the sausage into 1 inch pieces.
Add all the ingredients to the crock pot and stir. Cook on low for 4 hours.
Serve with Corn/Johnny cakes

It would be great to see your bean or chili recipes as well, feel free to post!

  • 2: Twinkle little star! Lets make some stars…
Knit or crochet Christmas tree star ornaments. Use them as gifts or on the front of cards Crochet a tree skirt Make a blanket
Here is a beautiful paper star and Sewing versions are also available.
But here is the project I encourage the most. Tin can luminaries! They are perfect for the next two seasons. Put them up as fall decorations and use them right through to Christmas. They would look perfect as accents around a jack’o’lantern or as lights for caroling in December.
alt text
Materials
1 large can, washed and label peeled. You can leave it silver, or spray paint with a paint meant for metal.
Nail
Hammer
Tea light candle, burnable or LED battery powered (From dollar stores in Christmas section)
coat hanger (or strong wire)and pliers with wire cutters (optional for hanging luminary)
1/2 inch doweling 1 1/2 feet long (optional)
small screw in hook. (goes with doweling)
Directions
Fill the can to the top with water and freeze until solid in the freezer (this keeps the can from crushing when you hammer)
Mark out a star shape and any other desired design with dots using a marker.
Place the nail on a dot and hammer through the can into the ice. Repeat for all your dots. Hammer two holes near the top rim across from each other for the wire handle if desired. Melt the ice and dump it out. Dry the inside and place candle inside.
To hang from a hook or tree….
Cut the coat hanger and thread through the two top holes. Bend into a handle shape and bend ends of wire up to keep from coming off.
To carry while burning….
Screw the hook into one end of the doweling and hook the handle of the luminary over it.
Hint: use a piece of dried spaghetti as a lighter if you don’t have a BBQ match or fire lighter.

  •  3: As a family, plan a fall yard work day.(It doesn’t matter what climate you’re living in, there is always seasonal clean up to do.)
Then the fun part! In the evening, Clear an area for a small camp fire. (As a child we would build it in the recently harvested vegetable garden at the edge.) Check with your local fire department for the local rules on backyard recreational fires. Most areas do allow small, contained fires. Don’t use the fire for burning brush or leaves. Here is a link for building fires and fire safety if you have never built one before. As dusk settles, light your luminaries for extra light and eat bowls of chili or baked beans and Johnny cakes as a family around the fire. Enjoy the sunset and make a wish on the first star.

by HatsFineandFancy 

p.s Don't forget the marshmallows! 

Monday, October 5, 2009

Read Along: Week Fifteen - Crossing the Creek

What a scary memory for a young child like Laura to remember. But this chapter does remind us that Pioneering was not the romantic image we give it sometimes. Life was dangerous and hard.
Activities for this week:

  • Sit down with the family and review swimming rules. Talk about the differences of swimming in a river or lake vrs a pool. Here is a wonderful link to the Red Cross to refresh you on swimming survival.
  • Despite the very bad day Laura’s family had, she still reflects on the beauty of a sun set. The activity for this week is to create something using the colors of a sunset. Here is a wonderful scarf pattern and a childs pullover.
But there are other artistic forms you could use to complete this activity…you could Photograph sunsets each night for a week, or do a series of timed photos in one evening. Step outside every 5 min and snap a photo from the same spot and see the changes of a night sky.


Or….Paint a Picture of a sunset. Here’s a Little House Group original tutorial!

alt text
(this is my cheaters version done on adobe illustrator)

Materials:
  • 1 piece of white sketch pad paper or water color paper (heavier bond paper a little lighter than card stock)
  • childs box of water colors with “sunset colors”
  • 1/2 or 1 inch wide paint brush (a childs brush will be fine as well)
  • spray bottle of water
  • clean sponge or soft rag
  • 1 piece of black construction paper same size as drawing paper
Directions:
Take a look at sunset pictures (google images is a great place to start) and note the colors, where they lay in the sky as the sun goes down. Use your picture as a guide to place your paint on the paper.

Spray your white paper with a thin mist of water. Make sure the entire sheet is damp. If your paper is shiny, it is too wet. Use a sponge to wipe off any extra water. (This is called a wet in wet technique. If you need pictures, here is a tutorial)

Start adding paint to the paper with a wet brush using your picture as a guide. The colors should start to bleed and blend together. Clean out your brush as you change colors. Spray the paper lightly again if the paper begins to dry.

Let your paper dry or try a alcohol or salt technique to make your sky paper extra interesting.
Take your black paper and fold it in half. With a pencil draw a frame and then 1/2 of a tree, attached to the bottom of the frame. Make it as basic or as intricate as you wish. Cut out the frame (with tree attached) and lay it over top of your dry water color sky. Attach with glue or tape or your favorite scrap booking method from the back
.
If you make 4 small sky papers, you could do 1 for each season. Sunsets tend to look different at different times of the year

  • Share a comment here about a special memory about pets in your life. They really are mans best friend!
By HatsFineandFancy

Wednesday, September 16, 2009

Read Along: Week Six - The Two Bears

Chapter 6 is called “The Two Bears”. We will also continue to do the Christmas in July stuff, as well.


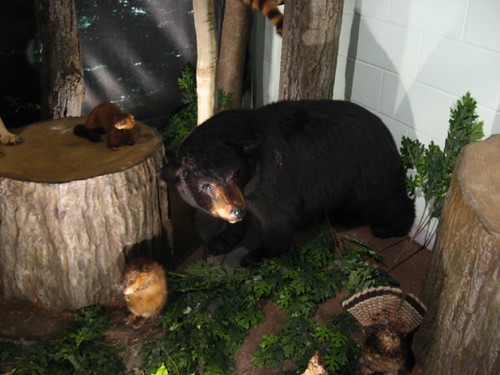
Pictures from HatsFineandFancy from a Museum visit.  The Ontario Black Bear

  1. Discuss different types of optical illusions. Look at Rorschach (sp?) prints and see what things you might find, or look at Escher paintings/prints.
  2. Google the type of brown bears that lived in Wisconsin during the mid-to-late 1800s. Compare to the types of bears that may live or have lived in your area of the world.
Christmas in July: .
  1. Flower pressing. For those of us in the northern hemisphere, flowers are all around us right now. Pick some flowers and press them in books or make a leaf press. After a couple weeks, make them into pictures, or put them in a scrapbook, with their names and where you found them. Or for Christmas presents, mount them into a picture frame to be hung on a wall or used as a serving tray. Or mount them onto cards or writing paper with clear mactac to give as stationary sets.

  2. Flower Pounding Tutorial: There are some great tutorials online. I have done this with preschoolers, and they love it! Find some brightly-colored flowers; some light-colored cotton or linen (no synthetics!) fabric; a rubber mallet, child’s building block, or something other that fits nicely into your hand and you can safely pound it without it breaking; a flat surface on which to pound; old newspapers/brown paper, or anything else you can use to place between the pounding surface and the fabric.
Cover your work area with the old paper. Pull off individual petals from the flower and arrange them however you would like on the paper. (This is best if you start small) You can make a picture, or arrange the flower the way it was naturally grown, or just petals from different flowers, etc. Carefully place the fabric on top in a single layer. Locate the petals underneath, and, taking your pounding tool, gently pound on top of the fabric where the petals are. You should be able to see the pigments of the petals coming through, especially if it is a thin fabric. The petals should eventually be destroyed, and you can only use each one once. But on the fabric, you should see the imprints of those petals. You can then set the colors on the fabric in your dryer, or even lay it out in the sun on the grass for a few hours.
 

Tutorial: Sewing Basket

I was rather unsuccessful at finding a nice basket for dd1 while at the thrift store today (though, we did find her a small picnic basket, complete with dishes, flatware, and toy food); however, I will share with you what I plan to do once I find one. There are 2 free patterns/tutorials on freepatterns.com and tipnut.com, which you may also use. I’m just going to “wing it” and make dd’s basket as follows:
  1. Measure the basket. If you don’t like the look of the outside and don’t mind covering it, measure the basket from top to bottom and from side to side (if it is a round basket, measure from top to bottom, then around), taking note of all your measurements. Measure the bottom of the basket, length and width, or the diameter if it’s round. Repeat for the inside of the basket.
  2. If you want your basket to be a bit plush, measure out and cut to size the batting you wish to use. If you don’t wish to use batting, skip this step. I will probably line dd’s with felt on the inside of the lining fabric instead of using batting. Fit the batting to the inside of the basket if desired.
  3. Measure and cut your fabric, giving at least 1/4” seam allowance. If you plan to use batting, make sure you add a little extra fabric, especially if you plan to bat the outside, as well. Make sure the pieces are either labeled or separated if you are covering the outside as well as the inside.
  4. Pin the inside side pieces together and sew all top-to-bottom seams. Fit and pin the bottom piece on, then sew. Place the lining into the basket and whipstitch in some way to the basket frame.
  5. Pin the outside side pieces together (if desired) and sew all top-to-bottom seams. Fit the bottom piece to the side pieces, pin, and sew. Place the batting where desired on the outside (if you choose)–I don’t recommend batting the bottom, however–and fit the outside cover over the batting. Whipstitch cover to the frame of the basket.
  6. Cut 2 12” lengths of ribbon, fold in half (so each length is 6” long) and sew to the side where you wish to attach your lid–these will be your hinges.
  7. You may use any of the following to “finish” the bottom of the basket: Take 2 lengths of wide coordinating ribbon and fit one length to the top rim of the inside of the basket, making certain that the top of the inside lining seam is covered by the bottom of the ribbon and the top of the ribbon does not go much past the top of the frame (in some cases, you may need a really wide ribbon). Hem-stitch the bottom of the ribbon to the top of the lining. Repeat with the second length of ribbon (if desired) for the outside of the basket. If using 2 lengths of ribbon, once they are hem-stitched to the fabric on the inside and the outside, sew the top edges of the ribbons together above the frame of the basket where they meet. If you want to skip the sewing of the ribbon(s), you can cheat and glue them on. I’ve even seen the ribbons stapled onto the frames and buttons either sewn on or glued on to cover the staples.
  8. Cut to size a piece of sturdy cardboard, plastic canvas, or whatever you choose to use for a lid.
  9. Cut to size your batting and fabric (again, adding extra fabric for the use of batting). Add an extra inch to the back of the fabric where the “hinges” will be tied to the lid. Sew together 3 sides of the lid cover, leaving the 4th side open.
  10. Place batting on the lid, and fit cover over both. Sew final seam closed. Sew a strong seam 1” inside the extra fabric–this should be where the cardboard/canvas/etc. ends.
  11. Place lid over top of basket. Mark on the extra 1” fabric where the ribbons are placed on the basket. Remove lid, and work 2 button holes wide enough for the ribbons to come through.
  12. Return lid to top of the basket and pull one side of the 6” length of ribbons through each button hole. Tie in a bow. you may wish to sew a strong knot in the middle of the bow to keep it from becoming untied.
  13. For a closure, you may choose to do any of the following:
a) sew one half of a frog closure to the lid and the other half to the basket where it would meet the lid.
b) sew a loop of ribbon to the lid, with a button over the ends of the ribbon, and sew a button to the basket
c) make a tab from extra fabric and sew snap closures to the tab and basket
d) be creative! use whatever you prefer. :)
If you like, go ahead and sew in some pockets to your lining.
you may also use your basket as you wish, but there will be more up-coming projects to outfit it (not to give anything away, but things like notions holders and the like–further details to come!!). We can even extend this sewing basket project for another week, since i was so late in typing up these instructions and I can’t find a basket yet.
Please post your results!

by Tracey4610

Free Blog Counter